Leave a Comment
Read on if you are a Mac user running Windows in Parallels Desktop 9 and having troubles with the upgrade. It might also be helpful if you also run Windows on Boot Camp and use the same Boot Camp drive as boot drive for your Parallels Windows virtual machine. There were many challenges in upgrading to Windows 10 especially using Parallels Desktop 9 which I have covered here with the solutions that worked.
Microsoft released Windows 10 on July 29th and I was one of many who registered for the free upgrade on all my Windows PC and Laptops. Most of them were running Windows 8.1 previously. The upgrade went smooth on one Windows laptop. The problems came when I tried to upgrade my MacBook Pro running Windows 8.1 on the Boot Camp partition as well as on Parallels as a virtual machine that boots from the same Boot Camp drive. I have run this configuration for years for the flexibility it gives. Running Windows as a virtual machine through Parallels along side OS X Yosemite helps me in developing software on both environment side by side. And also having the Windows installed to a Boot Camp drive (from where Parallels VM also boots from) helps to boot directly to Windows on the MacBook to gain exclusive access to its hardware when needed. The one system that is not getting the upgrade is my HTPC (Home Theater PC) since Microsoft dropped WMC (Windows Media Center) in Windows 10.
Apple just released the updates to Boot Camp that supports Windows 10 on August 13th. The details on how to upgrade is in their support page.
https://support.apple.com/en-us/HT204990
If you are running Windows on Boot Camp, then the upgrade or a new install is as simple as explained in the support article. But there are surprises for people who use Parallels Desktop 9 (and NOT the latest version 10 of their software). I’m using PD 9 and have not upgraded it to version 10 for one reason, it works good enough for my needs and the reason for upgrading to version 10 did not prove any cost benefits.
As I did on my other Windows machines, I registered for the upgrade on my MacBook Pro running Windows 8.1 on Parallels/Boot Camp. But a week ago when I tried the Get Windows 10 task bar upgrade program, it gave me this message.
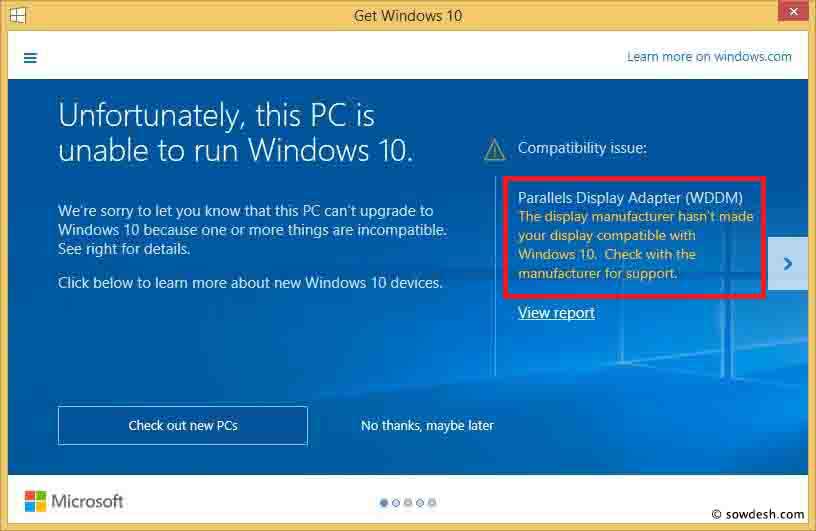
Windows 10 upgrade problem in Parallels Desktop 9
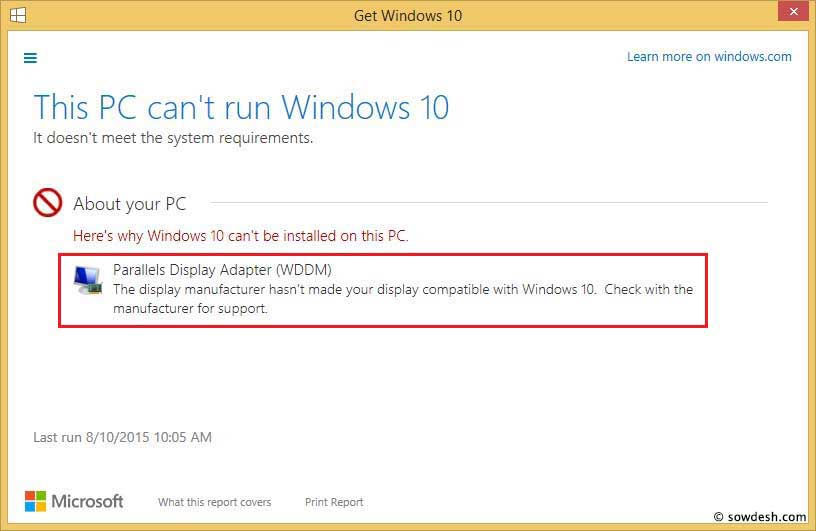
Parallels Display Adapter (WDDM) Error while upgrading Windows 10
Also, I started noticing PD 9 popped up with an upgrade message that said the below.
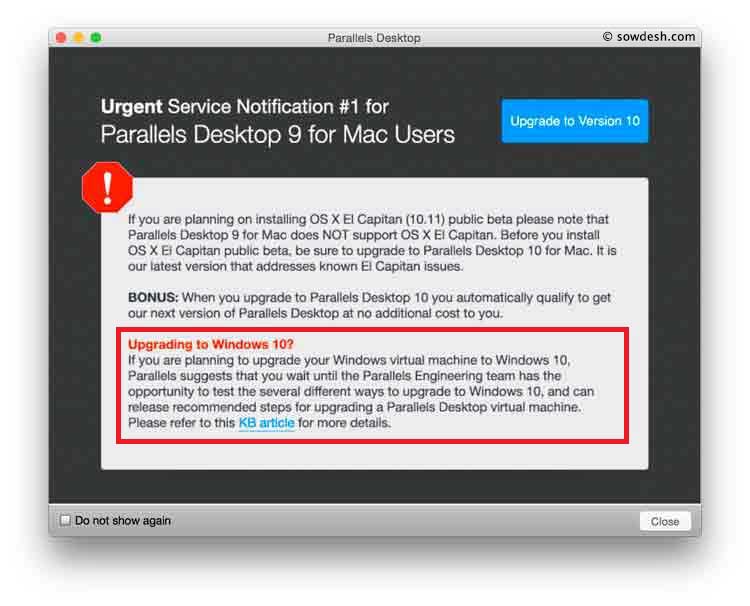
Parallels Upgrade Message
Well, it says they are working on making the software compatible, but the link leading to the KB article suggests users to upgrade to “Parallels Desktop 10” to use Windows 10. This is dumb marketing by Parallels in my opinion. My question was, why cannot the final release of Windows 10 work on PD 9 when the technical preview worked just fine? This sounds like an ugly marketing by Parallel’s to dumb on their customers and make them buy their newer version of software. Don’t know if Microsoft also has anything to do in partnering with them to play this game together. Or, probably they didn’t realize anyone who runs more than one Operating System on a single PC is above average when it comes to computer skills. So, stop dumbing smart people Parallels.
Windows 10 Upgrade in Boot Camp and Parallels 9
Install Windows 10 directly from Microsoft
If not via the task bar upgrade program, you could still install Windows 10 using Microsoft’s “Windows 10 Media Creation Tool” downloaded from here:
https://www.microsoft.com/en-us/software-download/windows10
Running the tool gives you the option to download and install Windows 10.
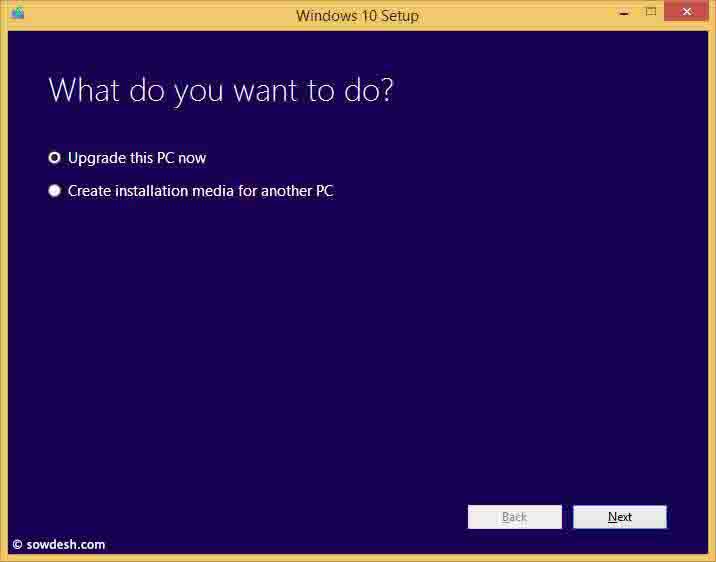
Windows 10 Setup using Media Creation Tool
But, if it did not work; read on and try some of the possibilities described below. But before trying anything, backup the Boot Camp partition if you use it. It should be easy to take a snapshot or backup of your windows VM using Parallels or Time Machine.
Backup Boot Camp Partition
The easiest way to back up the Boot Camp partition without using any special backup programs is to use Disk Utility from OS X. That’s what I do and works great.
- Run Disk Utility from OS X.
- SelectBOOTCAMP drive and click “New Image” option on the top. IfBOOTCAMP drive is not mounted, mount it first choosing the “Mount” option.
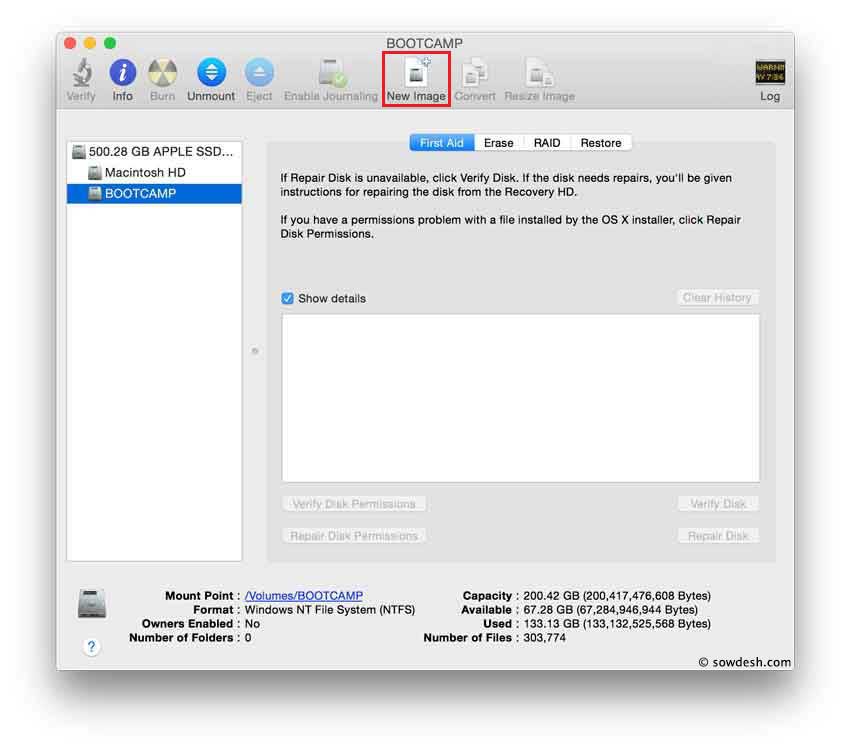
Backup BOOTCAMP drive using Disk Utility
- Select the destination where you want to save the “BOOTCAMP.dmg” file from the displayed window.
Pre Upgrade Preparation
Create and have a Windows 10 Boot Camp installer USB drive and iso image handy to use to repair any boot up problems in Parallels after Win 10 upgrade is complete.
Create Windows 10 Boot Camp Installer USB Drive
We will try to download the Win 10 ISO image and create a USB Install Drive with the latest Boot Camp software and drivers.
- From a Windows PC, download the “Windows 10 Media Creation Tool” from https://www.microsoft.com/en-us/software-download/windows10 for the Windows 10 distribution you need.
- Run the tool and select the “create installation media for another PC”option andproceed.
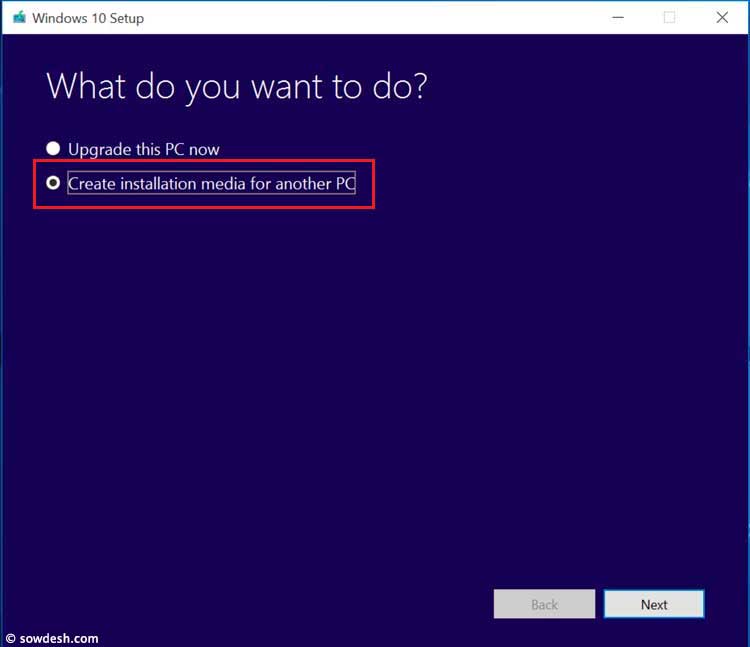
Media Creation Tool Option
- In the “Choose which media to use” screen, select “ISO File” to create an iso image file. Select the destination to store the iso image file. The download should take some time to complete.
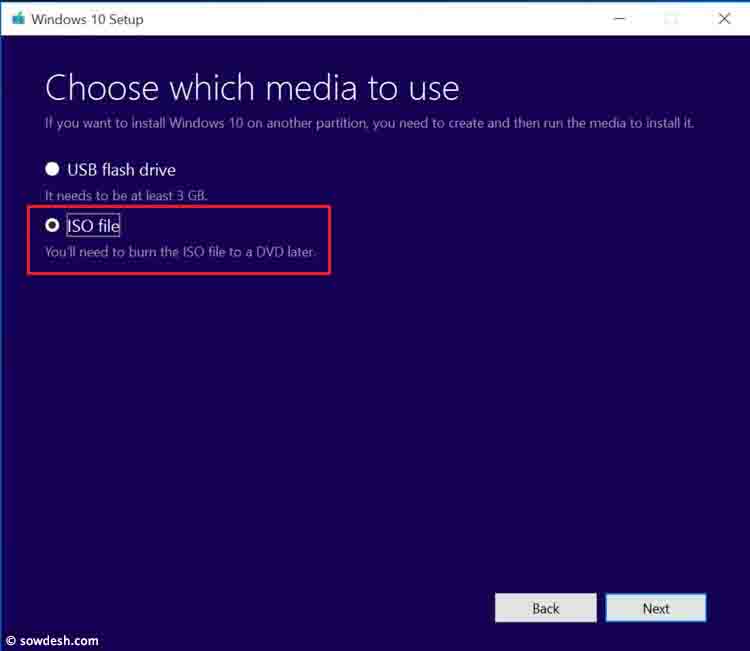
“ISO File” option in Media Creation Tool
- Once the file is downloaded, copy the file to your Mac.
- On the Mac, make sure all available upgrades are applied from the App Store.
- Open Boot Camp Assistant and create the Win 10 install drive using the ISO image file you just copied. This should also download the latest windows support software and drivers to the USB drive. Boot Camp Assistant options to chooseis shown below.
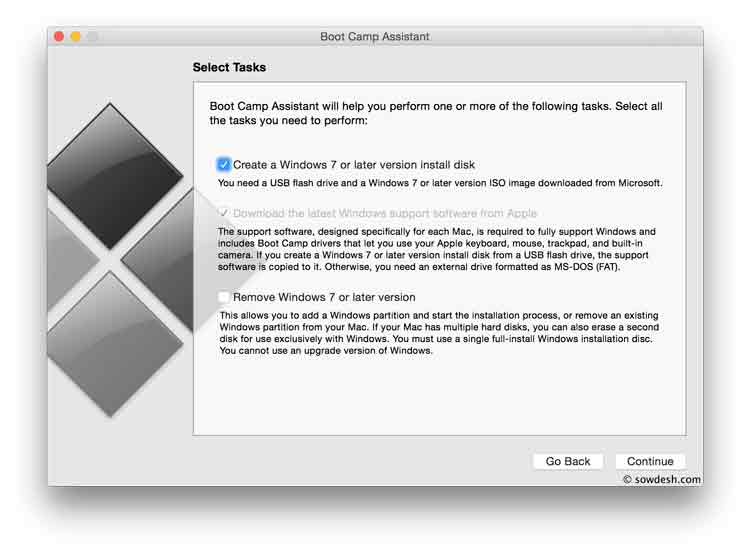
Boot Camp Assistant Options
Create ISO Image of Windows 10 Install Drive
Create ISO image of the USB Flash drive just created in the above step. This will help in repairing any boot issues in Parallels by attaching the ISO file to the CD/DVD drive of the virtual machine and booting from there. Follow the instructions in the below link to create the ISO image from Mac.
http://support.apple.com/kb/TS5373
The procedure to create the ISO of a flash drive is the same as creating iso from a CD or DVD disk. Just choose the flash drive as the source in this case.
Upgrade to Windows 10
As noted in the Win 10 upgrade utility program’s error message, the problem that prevents from the upgrade is because the “Parallels Display Adapter (WDDM)” is not compatible. Parallels installs this display driver as part of the “Parallels Tools” installed on the Windows VM. You can see this program in Control Panel > Programs.
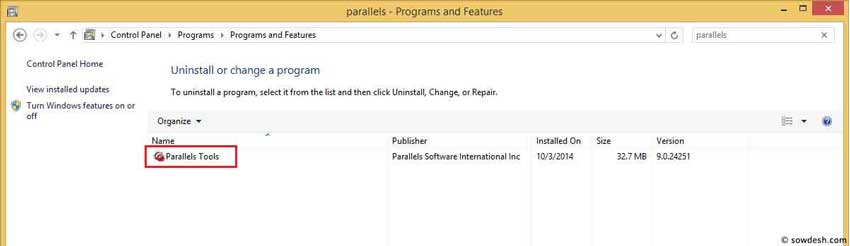
Parallels Tools in Control Panel -> Programs
And you can see the “Parallels Display Adapter (WDDM)” device listed in Device Manager when you are booted as a VM in Parallels. This device is not loaded when booted through boot camp though. Boot camp uses native display drivers supplied by Apple for the display adapter in your Mac model.
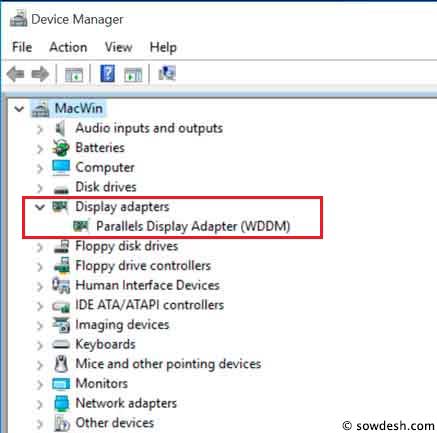
Parallels Display Driver (WDDM) in Device Manager
Delete Parallels Windows VM
For Boot Camp/Parallels: Delete the Windows VM from Parallels, we will re-create it once Windows 10 upgrade is successful in Boot Camp.
For Parallels VM Only: If you run Windows strictly as a virtual machine then don’t delete it.
Install Windows 10 Using Media Creation Tool
For Boot Camp/Parallels:
- Install all Windows updates and Apple updates on your current Windows before proceeding to upgrade Win 10.
- Try installing Windows 10 using the Media Creation Tool. If it fails, try uninstalling the “Parallels Tools” from Programs in Control Panel and retry the install again if trying from Boot Camp.
For Parallels VM Only:
- Install all Windows updates and Apple updates on your current Windows before proceeding to upgrade Win 10.
- There should not be a problem upgrading using the Media Creation Tool. Warning: Uninstalling the Parallels tools will uninstall the Parallels Display Driver and that might cause the VM to not display anything. So play with caution.
After the upgrade make sure the Windows 10 activation is valid by going into Settings -> Update & Security
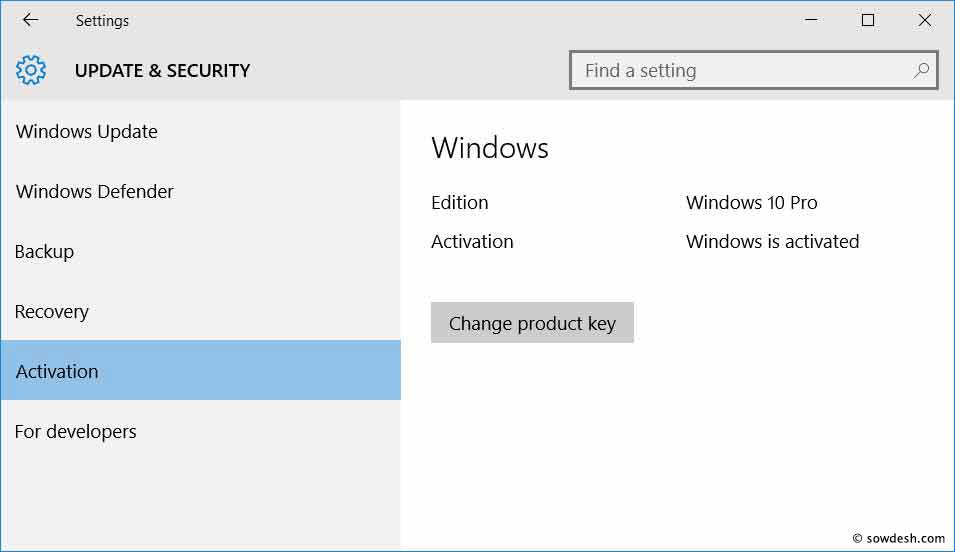
Windows 10 Activitation
Create Parallels Windows 10 VM
If you deleted the VM in Parallels previously, then follow below steps in creating the Win 10 virtual machine back. How you create the VM is critical here.
- Select “New” from the Parallels File menu to create a new VM.
- Select the “Install Windows or other OS from a DVD or image file” and continue.
- Select “Locate manually” from the next screen and then continue. You will notice if you are using PD 9, the option to create a VM using Boot Camp drive is no longer available.
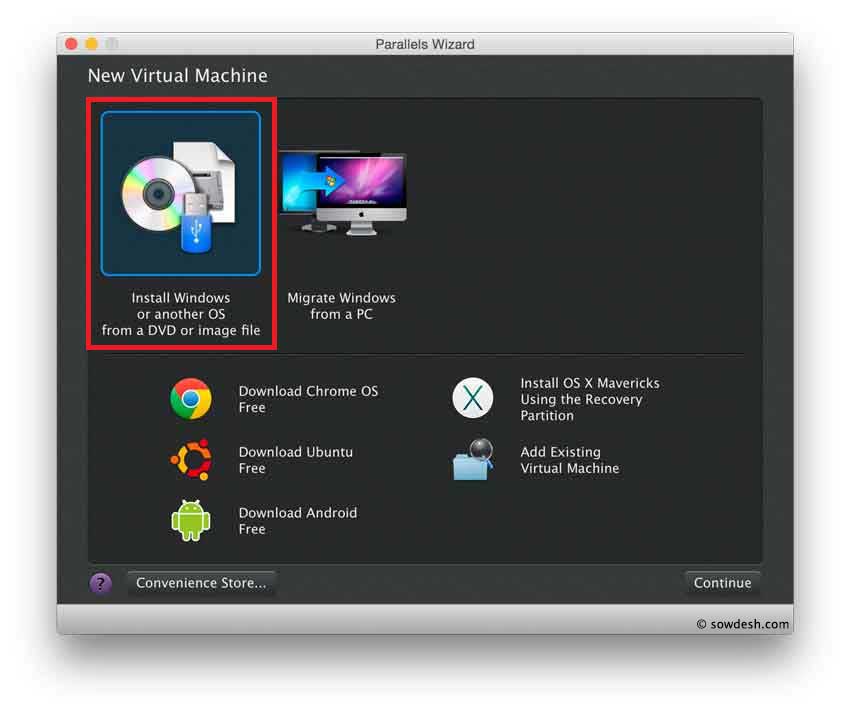
Parallels New Virtual Machine Creation Menu
- On the “Install From” screen, select “Windows 8.1” as the operating system and make sure to check the “Continue without a source” and then continue.
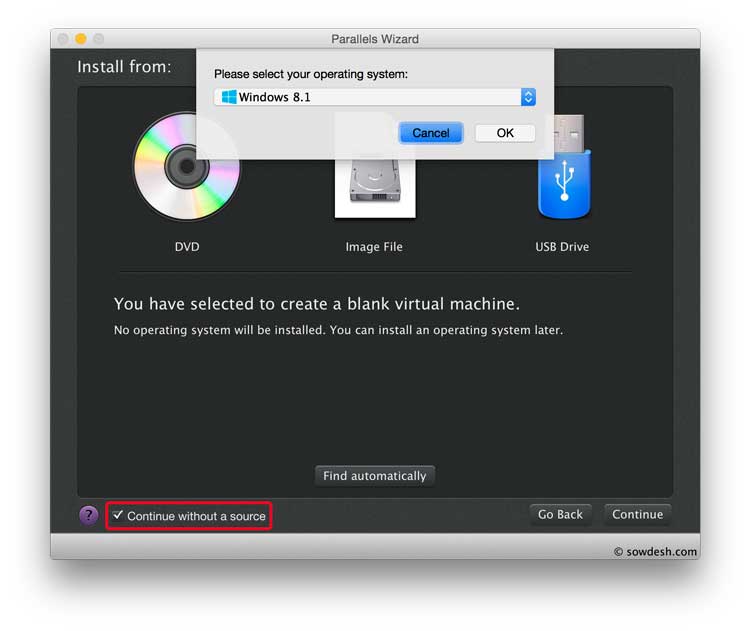
Parallels New VM Creation – Install From
- On the “Name and Location” screen, make sure to check the option “Customize settings before installation”
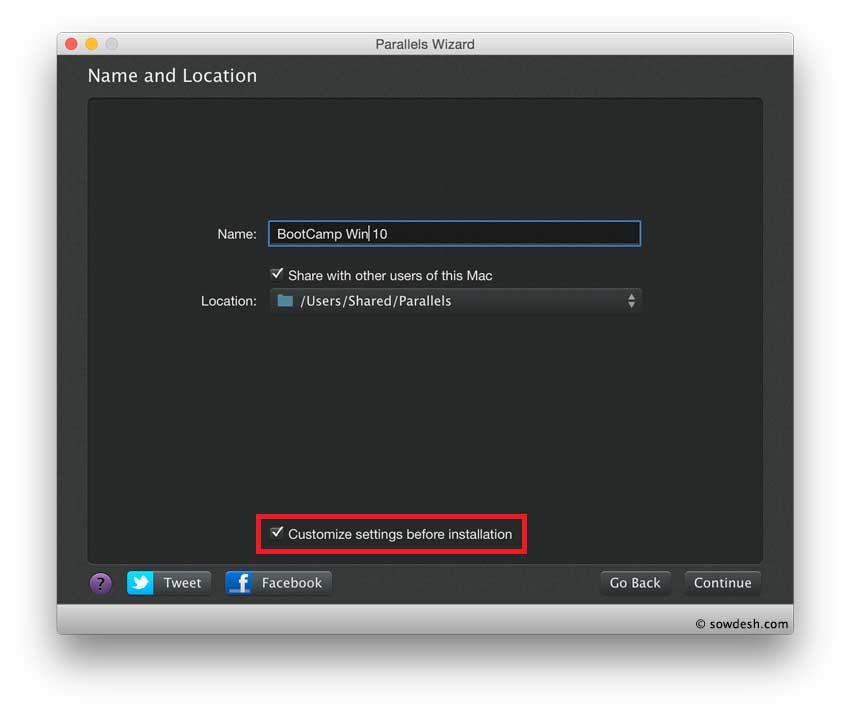
Parallels New VM Creation – Name and Location
- TheVMconfig settings will pop-up. Go to “Hardware” tab and select “Hard Disk 1”. Make sure to choose the Boot Camp drive as the source.
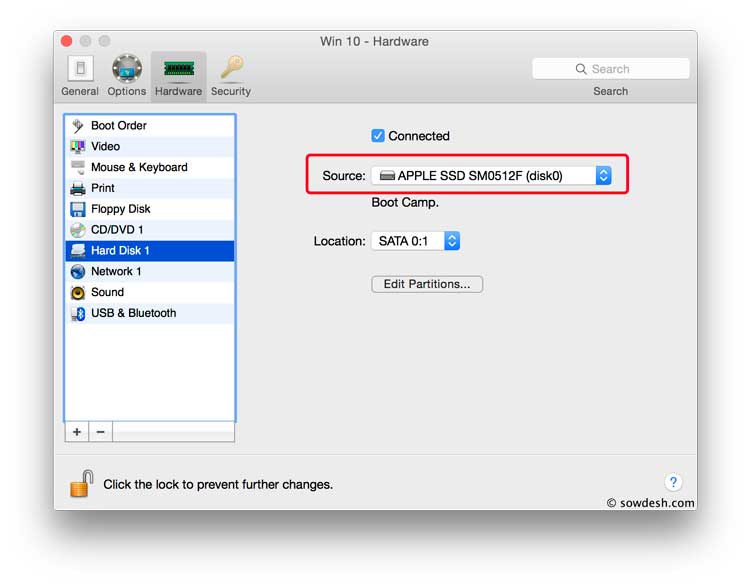
Parallels VM Settings – Hardware
- Click on “Edit Partitions…” and check both drives listed. This will unlock both the OS X and Boot Camp drive for updates.
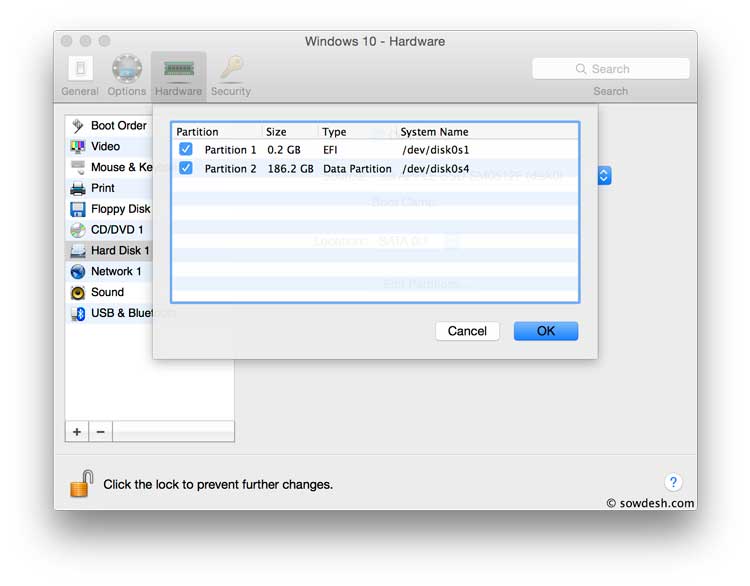
Parallels VM Settings – Edit Partitions
- Clicking OK and exiting out of the config should start creating the virtual machine.
Try starting the virtual machine. There could be an error message saying the windows version is not supported, just click Continue and the Windows 10 VM should start without any problems.
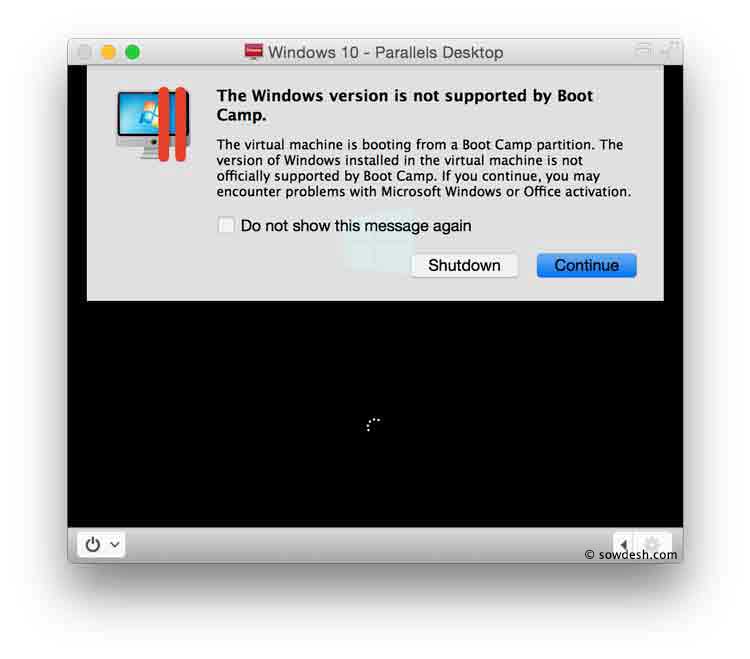
“The Windows Version is not supported by boot camp” message
Troubleshooting Tips
- If Parallels cannot find the Windows 10 boot partition, try to delete the virtual machine and re-create it with different settings. For e.g. use “Windows 2012” as the VM type.
- If Win 10 does not boot and stalls on a blue screen, try to mount the “ISO Image File” created off the Boot Camp install flash drive. Change the boot order in the VM to boot from the ISO image and try repairing the Win 10 installation.